
Although stationary is probably the first thing I should have thought about, it was the second. The wedding favours were the first.
Okay, so the idea was to give my guests a country garden gift to go with the theme. My thinking was jars filled with yummy preserves. My mum's homemade jam is delicious and, luckily for me, she also has a friend that keeps bees. Hello Honey!
I then decided that jam would be the ideal gift for the ladies, and honey for the men.
This was my starting point, so naturally I started looking for further inspiration.
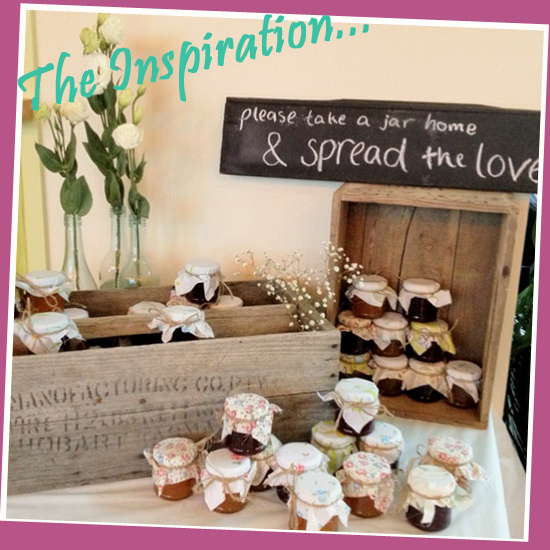
I love the way the jars have been laid out in this photograph. This is a good idea for the evening guests as the day guests will have theirs at their place setting.
The fabric toppers are traditional and cute and would look lovely if they were all different patterns.
Image found on Pinterest.
I love the personal touch, and even though homemade jam and fresh local honey is personal, it wouldn't be something I had created. To add that extra touch to the favours, I have decided to cross stitch the jar toppers.
The Idea:
Ladies - A cross stitched butterfly for the jam
Gents - A cross stitched bee for the honey
Young Children - A cross stitched ladybug

3 down, 117 more to go! Okay so there is a lot of work to do to get approx 120 toppers done it time. You find though that the more you do the faster you get and it is quite therapeutic.
Tip: It may sound like common sense, but if you are planning a crafty wedding, start waaaay in advance (around a year or so). Only because the deeper you progress into your plans, the more you struggle to find the time to keep on top of things. If you have friends or relatives that can help you out, let them! My mum is cross stitching in every spare minute she has!
The Process

After cross stitching my first bee, I decided the topper needed to be softened and made slightly bigger by the use of fabric. I picked up a couple of meters of cheap white cotton fabric from my local sewing shop and hit the sewing machine!
Tip: If you would rather use different patterned fabric for your jar toppers instead of cross stitching, alot of sewing shops should give their scrap fabric away for free (which would be ideal). Penny Saver!

So here it is. My first finished jar topper! I can't wait to see what the others look like.
The jars I am using are 4Oz / 120ml round glass jars from Amazon.co.uk. and are an ideal size for wedding favours (smaller ones are available).
FYI: When using jars for food such as jam, they will need to be sterilised. When ordering, I found out that a lot of jars are not sterilised because of the manual handling they go through, in which case you will need to sterilise them in the oven yourself.
I feel the perfect finishing touch to these favours, would be personalised labels, which I have yet to sort out.

I have found some gorgeous ones on notonthehighstreet.com which would fit the jam and the honey perfectly. I love the colour and finish of the labels too. They are so simple and would fit the theme like a glove!
There is a bit more work to do on the favours yet so keep watching this space! I will update it with further images as the project progresses.
Jam jars not float your boat?? Other ideas that fit the theme include:
- Personalised packets of seeds
- Miniature pails of sweets
- Floral scented Yankee candles
- Floral cupcakes
- Small vintage gift-wrapped boxes of sweets
- Mini jars of strawberry bon-bons
Check out my boards on: Pinterest
No comments:
Post a Comment
Thank you for commenting! Your comment will be published once I have had a gander. Zo..x