Showing posts with label Tea Party. Show all posts

Sunday, 20 April 2014

Flower Jars

Hello everybody and Happy Easter!!

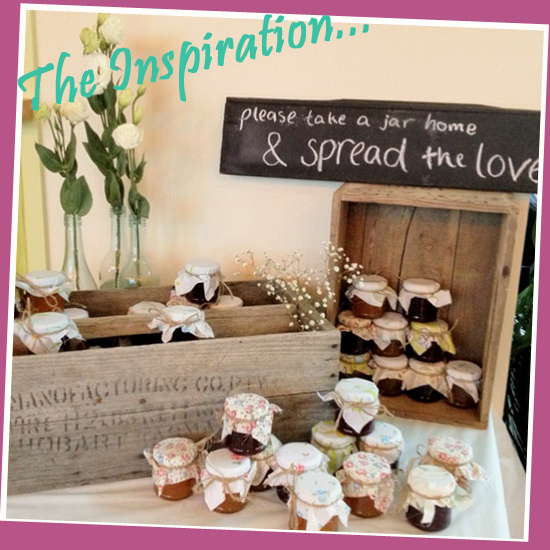
A couple of weeks ago, I started working on doing up some old jam jars to fill with spring flowers for the wedding. However, I think they are also perfect for Springtime celebrations - especially Easter Sunday. So instead of showing you how to work on an egg-themed project, I will be talking you through the process of how I made these simple 'vases'. They will look lovely on an Easter buffet table filled with daffodils.


Knowing that I wanted to use them for the wedding, I have spent the last year collecting jars of various shapes and sizes (with the help of my Mum and dear ol' Nan). For this project I had a rummage through them all and picked out my favourites ready for up-cycling. Once the jars were washed, I set up a 'station' outside ready to get working. I wanted to incorporate the colours of the wedding into the decoration of the jars, and so I decided to spray paint them. I only sprayed each jar approximately a third of the way up to add a bit of colour. I felt that doing the whole jar would compete with the colours of the flowers. Spray paint works better than brush painting as it gives a smoother finish. To do this, I bought three small cans of PlastiKote Fast Dry Project Enamel spray paint from Wilkinsons for £3.45 each. They are supplied at various other stores as well - see for yourself on the PlastiKote Website.


To achieve a clean line when spray painting, I used masking tape. Using a ruler and a CD marker, I marked about a third of the way up each jar all the way around. I then followed these marks with the masking tape to ensure I would get a clean, straight finish. I then worked my way up the rest of the jar with masking tape so that no other part of the jar would get marked with spray paint.

Then the fun began! 
Now for health and safety reasons, (which our wonderful country seem oh so fond of nowadays!) I would advise you do this in an open space (preferably outside) and even wear a dust mask. Start spraying the paint directly onto the glass jar - making sure you get an even coat all the way round. Another reason for doing this outside is because the paint gets EVERYWHERE! I came in dusted with paint in my hair, on my clothes, on my face, on my camera.... Once I finished spray painting each jar, I put them on a separate newspaper-covered table to dry. I repeated this method until all of them were done. The paint takes a few hours to fully dry.


Once dry, I carefully peeled off the masking tape.
And there we have it! Pretty, colourful jars ready for displaying seasonal flowers. Have a go at creating some fun floral jars for your next spring event. Its cheap, cheerful and so simple to do (and who doesn't like that?). I would love to see your take on it.


For the actual wedding, I would like to add some ribbon or lace as well. When they are all set up on the day, I will make sure to take some photos to share! 

I hope you enjoyed. Have a wonderful Easter and as always, keep watching this space!

Zo..x

Monday, 2 September 2013

Take A Seat At...

I'm sure you are all aware that table numbers play an important role in a wedding - even though they are such a small part of it. Your guests will walk through the doors, into the reception room, locate their name on the table plan, see the table number and off they pop to sit at their seat as happy as Larry (until they realise who they are sharing a table with!). 
Now I believe that just because table numbers are functional doesn't mean they can't be pretty - I mean they will become part of the decor after all. Because of this, I have decided to do just that, and make my table numbers part of the decoration.

Design Idea
The theme of my wedding is quite 'English Country Garden'. In-keeping with this, I have decided to name my tables after flowers rather than give them a number. After meeting with my florist, I gathered up the names of all the flowers being used on our big day and hey presto! I had my table names.
Once I had decided on the table names, I started to think about how to display them on each table. Before long I had four main elements I wanted to work with:
        - Photo frames
        - Floral paper
        - Diamantes
        - Pearls
The idea was to display the table names in attractive photo frames, backed onto floral paper and embellished with diamantes and pearls. In my head it looked lovely - I just had to try it out...!


___________________________________________________________


I started by choosing floral paper to mount the table names onto. I have used the same 12"x12" papers as I did on my Save-The-Dates to maintain continuity. These good quality papers come in a 32 pack (16 designs, 2 of each) and are available from Daisy's Jewels and Crafts.
I should be having around 10 tables at the reception (including the head table) and have chosen a different style paper for each one.


I wanted to add a touch of glamour and interest to the table names. Whilst visiting my recent home-away-from-home (Hobbycraft) I found some self-adhesive diamantes and pearls that would do the trick. I decided to add both to the mix and alternate them around the table name. The fact that they were self-adhesive sold them to me. This meant less mess to worry about and I knew they would look neat (no excess glue to ruin the look). 


I chose some thick, good quality paper in a parchment-style for the table names to be typed on to. I thought this style would add some charm and mix well with the floral patterns. I decided on the same font that I used on my Save-The-Dates for the Flower Names. To impress the passionate gardeners on my mum's side of the family, I included the Latin name underneath to add an extra touch!

Now even though I loved this idea and wanted it all to look as high quality as possible, I had a slight issue with finding the correct photo frames. As you know, they are not the cheapest of items to come across if you want something that looks half decent. I found that on average, the kind of frames I were looking at were around £8.00, which is £80.00 altogether!!! As I am trying to do a wedding on a budget, this just wasn't feasible. 

After a lot of searching, and thinking until my brain hurt I came across some pale blue and silver glossy frames in.... wait for it.... Poundland! Which came to a grand total of £11 (I bought one extra just in case). They fit the bill perfectly and look a lot better than one would have expected. During the process of creating my own decor, I have found that you really have to search, rummage and think a little more outside the box to get your perfect look for good money. 

And here they are! The end product.
In case you are wondering, they did take a little while, but I worked on them gradually in my spare time. This made them a fun little project. My one niggle would be the measuring out on each and every one to make sure every piece of paper were the same size and every diamante and pearl were spaced evenly. Having said that, precision is not a bad thing!

I would love to know your thoughts if you have any. Would you have done anything different? Maybe you have worked on something similar yourself. Keep me posted.

Keep watching this space.

Zo..x


Saturday, 13 April 2013

Fab Favours

So the first chapter for my very first craft blog is my own wedding. Reason being, I would like to hand-make a lot of it (making it the perfect HBZ blog project).

Although stationary is probably the first thing I should have thought about, it was the second. The wedding favours were the first.

Okay, so the idea was to give my guests a country garden gift to go with the theme. My thinking was jars filled with yummy preserves. My mum's homemade jam is delicious and, luckily for me, she also has a friend that keeps bees. Hello Honey!
I then decided that jam would be the ideal gift for the ladies, and honey for the men.

This was my starting point, so naturally I started looking for further inspiration.


I love the way the jars have been laid out in this photograph. This is a good idea for the evening guests as the day guests will have theirs at their place setting.

The fabric toppers are traditional and cute and would look lovely if they were all different patterns. 


Image found on Pinterest.


I love the personal touch, and even though homemade jam and fresh local honey is personal, it wouldn't be something I had created. To add that extra touch to the favours, I have decided to cross stitch the jar toppers.

The Idea:
Ladies - A cross stitched butterfly for the jam
Gents - A cross stitched bee for the honey
Young Children - A cross stitched ladybug


3 down, 117 more to go! Okay so there is a lot of work to do to get approx 120 toppers done it time. You find though that the more you do the faster you get and it is quite therapeutic.

Tip: It may sound like common sense, but if you are planning a crafty wedding, start waaaay in advance (around a year or so). Only because the deeper you progress into your plans, the more you struggle to find the time to keep on top of things. If you have friends or relatives that can help you out, let them! My mum is cross stitching in every spare minute she has!


The Process


After cross stitching my first bee, I decided the topper needed to be softened and made slightly bigger by the use of fabric. I picked up a couple of meters of cheap white cotton fabric from my local sewing shop and hit the sewing machine! 
Tip: If you would rather use different patterned fabric for your jar toppers instead of cross stitching, alot of sewing shops should give their scrap fabric away for free (which would be ideal). Penny Saver!


So here it is. My first finished jar topper! I can't wait to see what the others look like.


The jars I am using are 4Oz / 120ml round glass jars from Amazon.co.uk. and are an ideal size for wedding favours (smaller ones are available).

FYI: When using jars for food such as jam, they will need to be sterilised. When ordering, I found out that a lot of jars are not sterilised because of the manual handling they go through, in which case you will need to sterilise them in the oven yourself.


I feel the perfect finishing touch to these favours, would be personalised labels, which I have yet to sort out.


I have found some gorgeous ones on notonthehighstreet.com which would fit the jam and the honey perfectly. I love the colour and finish of the labels too. They are so simple and would fit the theme like a glove! 


There is a bit more work to do on the favours yet so keep watching this space! I will update it with further images as the project progresses.


Jam jars not float your boat?? Other ideas that fit the theme include:
  - Personalised packets of seeds
  - Miniature pails of sweets
  - Floral scented Yankee candles
  - Floral cupcakes
  - Small vintage gift-wrapped boxes of sweets
  - Mini jars of strawberry bon-bons

Check out my boards on: Pinterest